
Introduction
The flowering stage can be considered to be the most important phase in the life-cycle of the plant as far as cultivation of marijuana is concerned. Every week has new issues and changings in conditions which have to influence the light, nutrients, water and environmental control to promote the buds. These changes in ways mean that whether you are growing at home or have a huge production, you will be able to enhance both the quantity and quality of your plants. In this guide, you will be taken through the weekly transition during the cannabis flowering stages and get tips from insiders.
Week 1-3: Early Flowering Stage – Transition to Flowering
Managing Water and Nutrients During Early Flowering
When your plants grow from the vegging stage to the flowering stage you will have to modify the nutrient solution you are feeding them. At this stage one has to balance the nitrogen while at the same time enhancing the content of phosphorus and potassium. Also, nitrogen is used in the synthesis of all vegetative growth but excessive rates hold back flowering and can inhibit nutrient absorption through lockout.
- Nutrient Ratios:Concerning nutrient ratios, early flowering requires NPK of 1-3-4 so as to promote the formation of buds. This can help wonderfully to make sure that your plant stop producing leaves and start producing buds instead.
- Watering Schedule: Too much water, however, causes the plants to be starved of nutrients, develop root rot or mold. Such a regime might mean that deep irrigations take place while the upper 1-2 inches of the soil gets dry before they receive another irrigation. In a hydroponic system do feed at a constant rate but do not over-feed, always check on the ppm since it refers to the nutrient level per million.
Pro Tip: Maintain the water pH level by using a digital pH meter that would range from 6. 0 and 6. 5. pH imbalances are very likely and nutrient lockout are possible throughout the early flowering periods which affects the overall health of the plant and the bud.
Adjusting Light for Maximum Growth
This is spurred by a change of light period of your plants to 12/12, a light cycle that represents the short days experienced in the autum. This has to be totally dark – sprouting loops need continuous darkness during the night phase, because if they get even a little light, the plants turn to veggies or become hermaphrodites.
- Light Intensity:For a 4 x 4 grow space, one should use 600W LED or HPS light, if one want to achieve 500-700 umol/m2/s light intensity for the plants. Lights should be approximately 45 cm from the canopy to prevent light burn, however heights may differ on the sensitivity of the strain.
- Spectrum:The difference in the light spectrum is that more red spectrum light should be included during this phase to encourage flowering. LEDs in a red light spectrum of 660n increase the hormonal signals for creating buds.
Troubleshooting Early Growth Issues
Some common problems are observed during the first two or three weeks and include nutrient deficiencies Nitrogen, Calcium, or Magnesium and Environmental stress which comprises of Humidity and Temperature.
- Symptoms of Nitrogen Deficiency:Yellowing of the lower leaves from the base up to the middle and the tips of the leaves. Feed them by providing a balanced nutrient solution, but do not over apply nitrogen as it will hinder the growth of buds.
- Environmental Stress:Ensure that the birds are exposed to the temperatures ranging 70-80°F (21-27°C) during the day time and drop the temperatures by 10°F at night as is usual in their natural habitat. Relative humidity should ideally be between 50 – 60 percent.
Pro Tip: If you see the curling or staining of the leaves, you should inspect the grow room for light infiltration since it can cause hormonal shift in the flowering stage.
Customizing Humidity and Light Cycles for Different Strains
Flowering of cannabis strains proves different in the sense that there is a variation in the time that is taken for the plant to flower. Indica dominant type tend to take shorter time in flowering and prefers a low humidity of 40-50% in a bid to avoid bud rot. Sativa dominant strains may be able to handle slightly higher humidity in the range of 50 to 60 % during the first three weeks of flowering time.
Pro Tip: In this stage of the Sativa plant development it is very likely to grow tall. They can train their height and light distribution to the shoot and lower buds by low stress training (LST) methods such as, bending of the branches.
Week 4-6: Bud Development and Growth
CO2 Enrichment for Bud Growth
Scientific studies reveal how CO2 injection into your grow room is highly effective at increasing growth and yield just before and in the flowering stage. But, for the growth of CO2, at least, light intensity of 700 µmol/m²/s is required and temperature has to be maintained constantly.
- Optimal CO2 Levels:Maintain control of CO2 with it ranging from 800 to 1200 ppm. If anything goes above that without correct light intensity and temperature regulation it may not lead to any other advantages.
- CO2 Delivery Systems:When it comes to small grow spaces there are CO2 bags or small canisters for growing plants in controlled environment. For the large or commercial plant, you need to get a CO2 controller that will come with a good regulator that will ensure that it gives CO2 continuously within a light cycle.
Pro Tip: When providing CO2 augmentation, increase the temperature in the room to about 75-85°F (about 24-29°C) because at this temperature the plant will be able to make good use of the CO2 that is availed to it.
Managing Stress Responses During Bud Development
When flowers are at their mid-developmental stage they are very much sensitive to stress. A high temperature, variation in humidity, even overfeeding can lead to a poor growth rate or stress induced factors such as foxtailing or hermaphroditism.
- Light Burn:If lights are clearly seen at the top of the canopy and with bleached appearance then such lights are placed too close. Just lower the light or decrease its brightness in order to avoid light stress.
- Humidity and Temperature:When flowers are developing, humidity should be lowered to 40-50% to avoid mold and mold spores and particularly where the plants have very thick, forest like structures to the buds. Ideal temperature levels should range between 70-80°F in the course of the day and 60-70°F at night.
Pro Tip: Oscillating fans should be installed so as to maintain temperature and circulation as to avoid formation of hot and humid areas.
Nutrient Management for Bud Growth
At this time, your plants are directing most of their energy towards the growth of buds, and this should be done with a lot of care regarding the nutrients input.
- Phosphorus and Potassium:Some of the common nutrient solution during this stage is 1-4-5 with a focus on phosphorus in flowering and potassium for the general health of the plant.
- Micronutrients:During the flowering stage calcium and magnesium are crucial to avoid a shortage that can create problems such as calcium deficiency known as calcium lock out which bring about curling and color changes in the leaves.
Pro Tip: As a way of preventing nutrient burn, it is important to begin administration of nutrients at low levels and gradually build it up. Check for ppm’s of runoff water to check that nutrient absorption is happening as it should.
Monitoring Plant Health and Pest Control
Some of the insects such as spider mite and aphids should be looked at more frequently without necessarily waiting for the usual intervals. Infestation during flowering is very detrimental for both yield and quality of the coffee thus the importance of controlling pest at this time. Organic pesticide should be used instead of chemical base pesticide like neem oil or use insects such as ladybugs to control pest.
Pro Tip: Take care to also check your plants daily and look under the leaves for pests. Sticky traps are useful can be used to check on the populations of soaring insects such as fwg.
Light Spectrum Techniques for Maximum Yields
There is something very interesting that shows that change in light spectrum can bring a big difference in production. During this stage, the ratio of red light is increased especially around 660nm which promotes bud growth while a small proportion of blue light lessens the stretching and helps in compactness of the plant structure.
Pro Tip: Recommended light types are full-spectrum LED lights since wavelengths of light can be adjusted depending on how plants are growing through the flowering stage.
Week 7-9: Preparing for Harvest
Flushing Your Plants Before Harvest
This process goes further to the last washing of the plants whenever you only water the plants with fresh water exclusively for about 1-2 weeks before harvest. This enhances the flavour and smoke production by a less accumulation of chemical in the plant.
- Flushing in Soil:Rinse with water until the water runs clear: use RO water at pH of 6. 0-6. 5. For hydroponics, the best water to flush the system is the reverse osmosis water.
- Signs of Successful Flushing:The fact that the leaves of the fan have started to turn yellow it means that the plant is using the stored nutrients which is clear indication that the flushing process is positive.
Pro Tip: Do not overwater while flushing the process since the facilities needs to be well drained. The above plants should also be stood in good drainage to avoid root rot or mold.
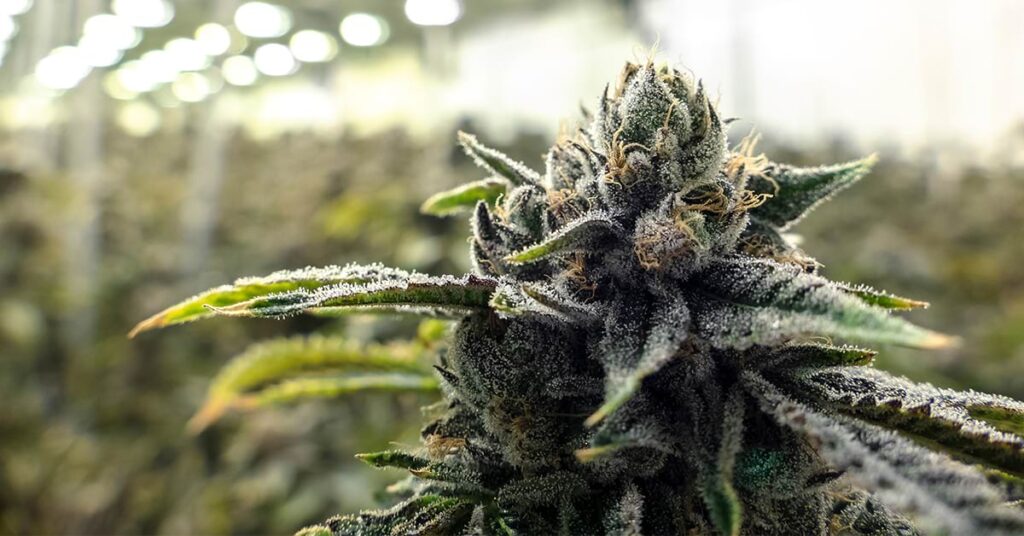
Checking Trichome Maturity for Optimal Potency
Another great way to know when you should harvest is based on the trichomes that are on your buds that you want to get harvested. These resin glands alter colour as the plant grows and attains its maturity hence the proper timing to harvest is vital to deeds maximum potency and taste.
- Trichome Colors: These hairs also known as trichomes if seen clearly means that the plant is still not ready for harvesting. White trichomes indicate that the plant has the highest levels of THC while amber colored trichomes indicate that THC has started degrading and thus smoking the cannabis will have a more stoning effect, it makes the consumer lazier.
- Tools: An enlarge glass of 60x- 100x or digital microscope will be used to closely examine the trichomes.
Pro Tip: It is recommended that trichomes should be harvested when the milky substance is at 70% and the amber colour at 30% for balanced effect.
Safe Harvesting Techniques for Maximum Yield
Yields can be costly to cultivate if harvested in the wrong time or if mishandled as this may cause the buds or trichomes to be damaged. Prune the plant to remove branches using sharp scissors and while removing the fan leaves, use gentle force. It is important that you do not squish the buds as this will destroy trichomes which contains cannabinoids and terpenes.
Pro Tip: It is recommended that the buds should be harvested in a cool dark place to minimize the terpenes’ breakdown due to heat or exposure to light.
Hydroponic System Optimization for Peak Flowering Performance
When it comes to hydroponic systems, a focus should be put in the quality of the water and the pH in the last weeks. The nutrient lock out syndrome is eliminated by rinsing the system with pure water and diluting the nutrient concentration.
- Water pH: The water pH should be maintained betwween 5. 8 and 6. Nutrient uptake was also highest at 0 during the flushing period while nutrient content optimum was after 7 days.
Pro Tip: The running water should be monitored from time to time for ppm so as to avoid accumulation of salts and other minerals in the growing medium.
Fine-Tuning Light Spectrum for Optimal Final Yields
To make this plant produce more resin and have the better quality at the end of its life cycle, it is recommended to add more red and UV light. UV light mimics the sort of stress that is naturally produced at the end of the growing process and assists the plants in formation of more trichomes for protection.
Pro Tip: It is in the last week that you should cut down on the light period to 10/14 hours to make it resemble natural conditions to promote ballooning of buds.
Pro Tips for a Successful Flowering Cycle
Best CO2 Practices for Higher Yields
The use of CO2 enrichment system comes in handy during flowering phase especially in areas where the rooms have been sealed. Maintain CO2 level between 800 and 1200 ppm to get the best density of buds. Just note that for higher CO2 level, use high light intensity of 700µmol/m2/s and keep the temperature around 75-85°F.
Tailoring Full-Spectrum LED Lights for Commercial Cannabis Success
Marijuana growers for sale should use full-spectrum LEDs that mimic the natural light throughout the day. This enables the plant to have a standard flowering environment hence increasing the quality yields. In particular, the usage of the 660 nm red spectrum LED has been proven to enlarge the buds and increase the THC level.
Optimizing pH and Humidity for Healthy Flowers
pH controls the availability of nutrients therefore it needs to be maintained at the right levels in the water. Aim for 6. 0-6. five hundred and five in soil and five hundred and five. 8-6. 0 in hydroponics. After the plants are in the mid to late flowering stage, it is also wise to maintain the humidity to around 40-50% because high humidity contributes towards mildews which can be very damaging to your yield.
Common Mistakes to Avoid During Flowering
Don’t give your plants too much fertilizers—when nutrients are heated up, they lower yields and the quality of your buds. Likewise, other devastation like poor light management including allowing light penetration into the dark area of the plant could lead to stressing or making the plant to be hermaphroditic. Supervise controls of the environment and check up plant condition from time to time.
Conclusion
Flowering stage requires cultivators to be attentive to some of the plant’s needs and this is one of the stages that requires close monitoring. Nutrients or light may be changed or the environmental conditions and all these factors as small as they might be will have an effect on the final productivity and the quality of the product. If you stick to this week-by-week regimen, you’ll be on your way to developing dense, high-THC, irresistibly tasty buds. Many of these guiding principles are valuable for the home grower and are particularly important for those who working on a large scale.
Pro Tip: This includes taking pictures of plants at least once a week and noting down their progress. It means that this data will be useful for you to adjust your future grows, and to guarantee high quality and efficiency of your creates.